
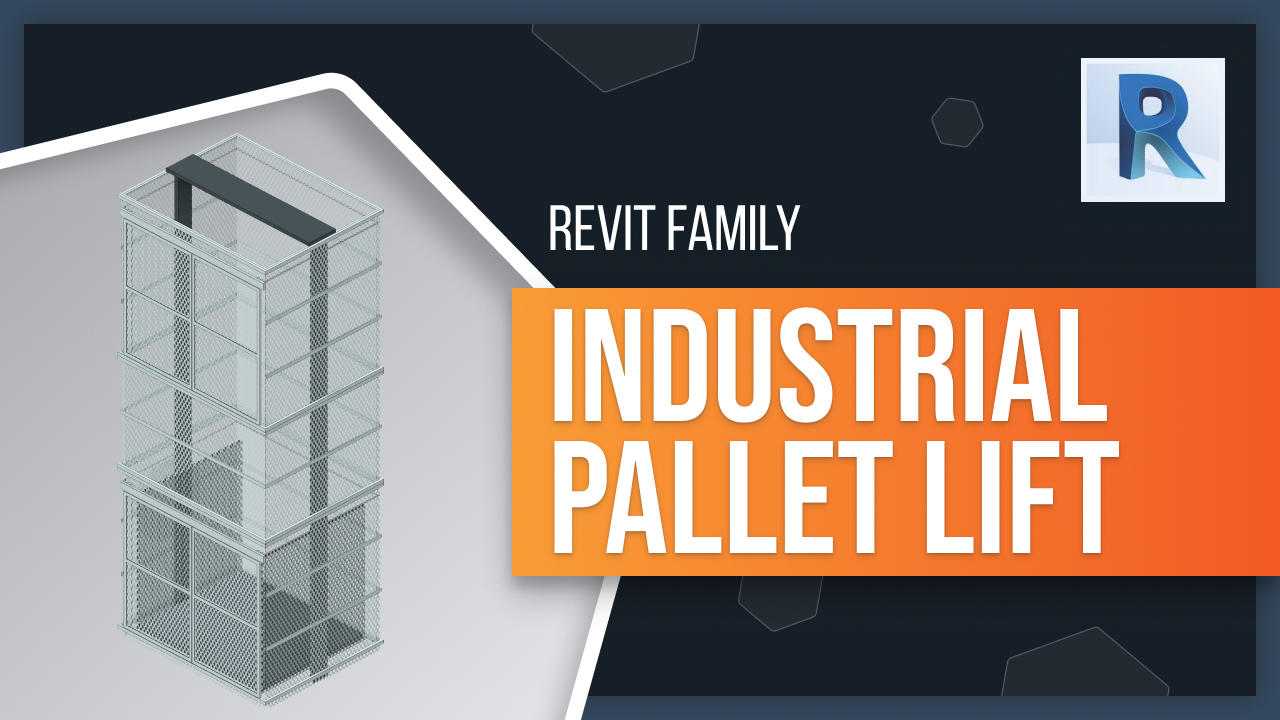
Are you looking for an efficient and safe way to transport goods between different levels or mezzanine floors? Look no further as we have the perfect solution for you - the Pallet Lift Family! This family offers three different configurations that can be easily inserted into any Revit project using Fetch app. Furthermore, it provides a clearance zone around itself so that area can be kept clear for safe operation. Not only this, but also there is a void included that allows you to cut through floor plates while maintaining safety measures such as setbacks and clearances around it! In this blog post, we will explain all these features in detail so read on to find out more about our amazing Pallet Lift Family! Welcome to our blog, where we cover the latest Revit tips and tricks, as well as showcase our latest BIM content. Today’s topic is the new Pallet Lift Family for multi-level industrial spaces. This lift family offers a safe and efficient way to transport up to 20 tonnes of cargo between levels or mezzanine floors in warehouses or workshops.
The Pallet Lift Family comes with three different configurations – sea configuration, same side configuration and mixed configuration. The sea configured lift will have landing doors on the same side and this allows goods to be transferred in one direction. On the other hand, the same side configured unit has a rear facing first landing with all other docks being front facing. Lastly, with the mixed configuration you will get doors on both sides which allows pallets and materials to pass through more smoothly.
You can easily configure your palette lift by using the Fetch app – simply insert it into your project from there, then click on it to view its parameters in the Properties window. In this window you can set the number of levels required as well as choose between surface or pit mounted options. You will also need to specify measurements such as platform width & depth, carriage height and floor-to-floor height.
This family not only takes care of transporting goods but also provides a clearance zone around itself so that area can be kept clear for safe operation; this zone can also be used with popular methods of class detection within Revit projects. Furthermore, there is a void included that allows you to cut through floor plates while maintaining safety measures such as setbacks and clearances around it! To use it, simply select the ‘cut’ tool from the Modify tab then select both Floor and Lift elements before cutting them together in one go!
Finally, don’t forget that you can always obtain the product code for this amazing Pallet Lift Family by clicking Sync Button in Fetch tab of Revit ribbon or directly from Fetch app itself! We hope that you found this article useful! Also, make sure to subscribe for more Revit related content!
Tags:
Revit