

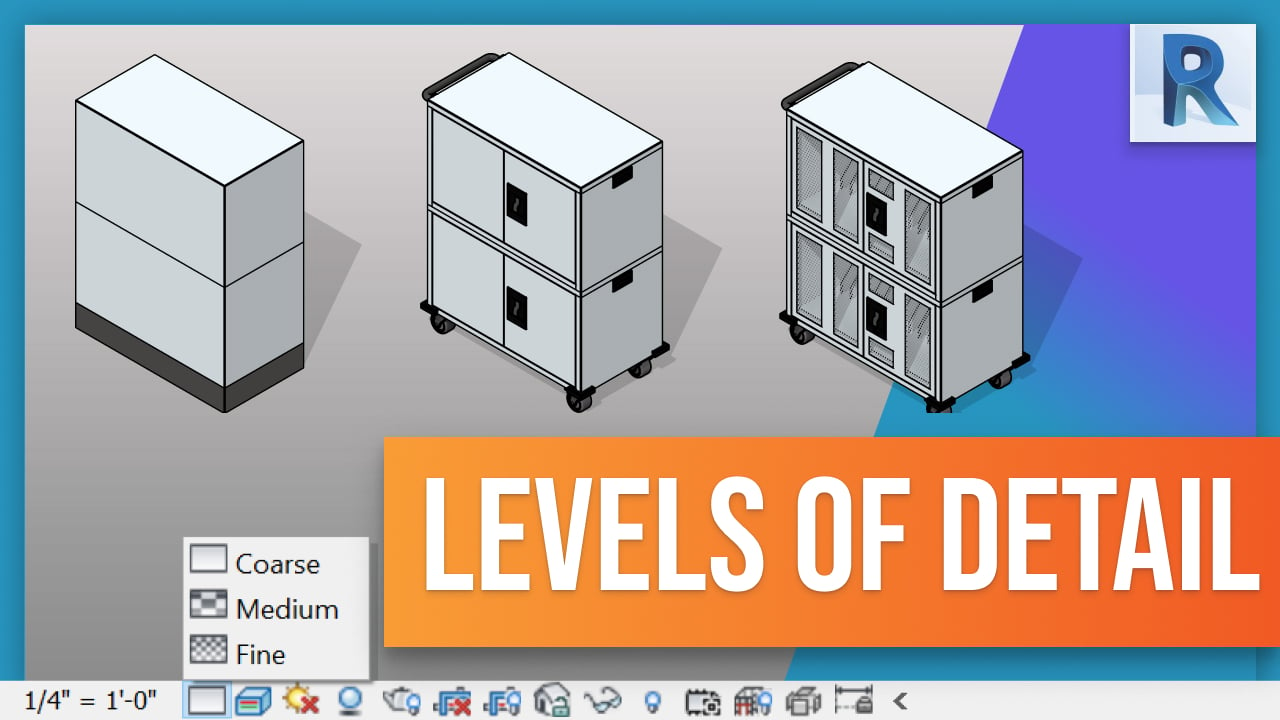
Working with detail levels in Revit can be a great way to add more precision and control over the elements shown in project views. Through the use of coarse, medium and fine detail levels, you can determine which components are visible at different scales or zoom levels. In this blog post, I'll discuss where to modify these detail levels as well as how they can be used when modeling families for anyone who is looking to up their game when it comes to Revit family creation! So read on and learn all about how you can make better use of detail levels in your models. In this blog post, I'm going to discuss the basics of detail levels in Revit and how they can be used to adjust how much detail is seen in a specific element in project view. Detail Levels are split into three categories: coarse, medium and fine.
I'll start by discussing where you can modify the detail levels - both on the property panel and on The View toolbar. You can also assign global settings for each level across different views using view templates.
Next, I will explain how you can use detail levels when modeling families. For example, if you have a chunky wheel that only needs to show up at a coarse level but has other components that need to be shown at higher details then you would assign those elements accordingly in the family editor visibility setting window. This works for any family that needs modification of its detail levels so it's important to pay attention to what is being shown at each particular level based on what your goal is with that drawing or view scale.
To wrap up this post, remember that working with detail levels helps elevate your model and makes it easier for users when using families created by yourself or downloaded from our Fetch website or app! So don't forget to check out our Fetch website or download the app for more tutorials and tips. Thanks for reading!
Happy modeling!